Line Notify with firebase cloud function

Line Notify with firebase cloud function
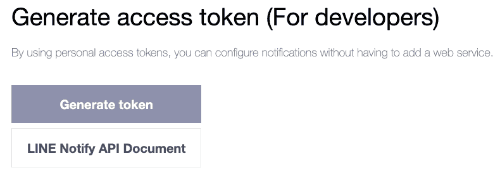
ก่อนอื่นเลยเราจะไปสร้าง Token ของ Line Notify Service กันก่อน ด้วยการเลือก Generate Token

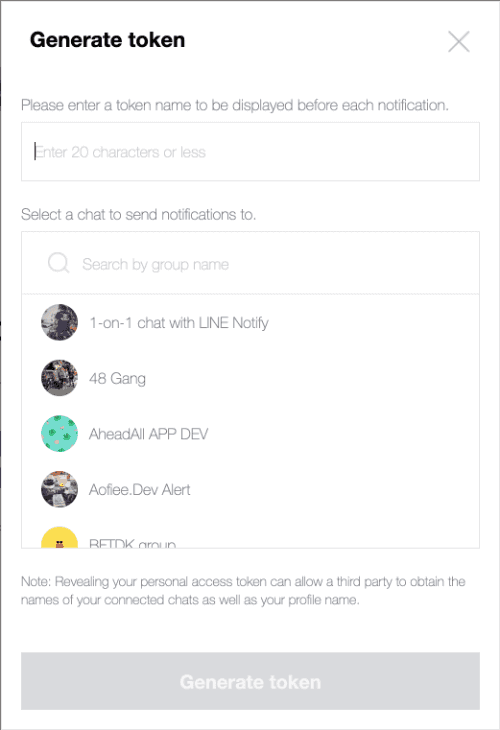
ตัวระบบจะเด้ง popup ให้เราเลือก group ที่จะแจ้งเตือนตัว Line Notifiy เข้าไป และให้ตังชื่อให้มันด้วย

หลังจากนั้นเรามาเขียน code เพื่อสร้าง cloud function กัน โดยผมสร้าง file functions index.js ขึ้นมาก่อน เผื่อไว้ในอนาคต ผมอยากทำ หลายๆ function ใน projectเดียวกัน
const functions = require('firebase-functions');exports.helloWorld = functions.https.onRequest((request, response) => {response.send("Hello from Firebase!");});
หลังจากนั้นผมจึงเริ่มลงมือเขียน ตัว Line Notify ที่จะนำมารับค่าจาก GatsbyJS โดยตั้งชื่อว่า blog-line-notify.js
const lineNotify = (request, response) => {const req = require('request')let msg = request.body.messageif (typeof msg !== 'undefined') {req({method: 'POST',uri: 'https://notify-api.line.me/api/notify',header: {'Content-Type': 'application/json',},auth: {bearer: 'token ที่เราได้มาจากการไป generate',},form: {message: msg,},}, (err, httpResponse, body) => {if (err) {console.log(err)response.send(err)} else {console.log(body)response.send(body)}})}response.send("Send Message data (" + msg + ") Completed.")}exports.handler = (request, response) => {lineNotify(request,response)}
หลังจากนั้นเราจะมาเรียกใช้ cloud function Line Notify ของเราในไฟล์ index.js ด้วยการ import มันเข้ามา
const functions = require('firebase-functions');const blogLineNotifyModule = require('./blog-line-notify');// highlight-lineexports.helloWorld = functions.https.onRequest((request, response) => {response.send("Hello from Firebase!");});exports.blogLineNotifyFunction = functions.https.onRequest(blogLineNotifyModule.handler);// highlight-line
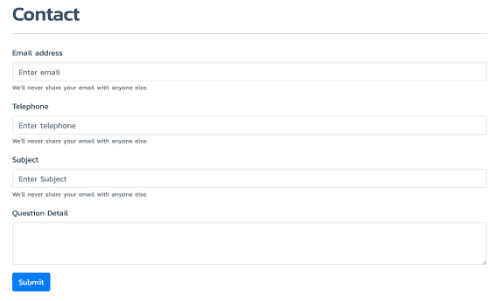
ก่อนอื่นเราจะทำการสร้าง Contact Form ด้วย GatsbyJS กันก่อนตามตัวอย่าง ที่นี่
ก่อน deploy ผมทำเผื่อไว้เรียกใช้ function นี้ผ่าน domain อื่นด้วยเลย เลยต้อง set Cross-origin resource sharing กันก่อน ด้วยการติดตั้ง cors
yarn add cors
แล้วทำการแก้ไข file blog-line-notify.js ให้รองรับ CORS กัน�ก่อน ด้วยการเพิ่มคำสั่งนี้ลงไป
exports.handler = (request, response) => {// highlight-startconst cors = require('cors')({origin: true})cors(request, response, () => {// highlight-endlineNotify(request,response)// highlight-start});// highlight-end}
จากนั้นเราก็ทำการ deploy ขึ้นไปบน Firebase โลด
firebase deploy
หลังจากได้ url ของตัว cloud function มาแล้วก็ทดสอบยิงด้วย Mr.Postman กัน โดยใช้ method การยิงแบบ Post และมีค่า Body เป็น raw ซึ่งเป็น JSON
{"message":"สวัสดีเจ้า"}

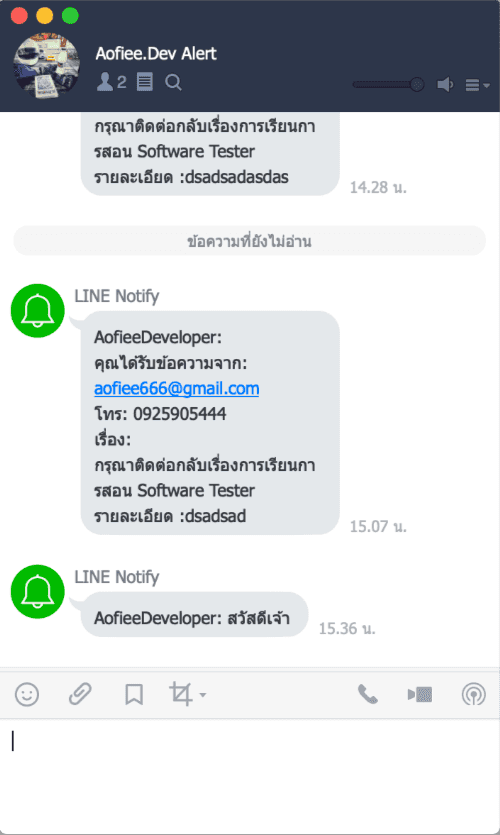
ผลลัพธ์ที่ได้ ง่อวววว

จากนั้นก็มาสร้าง Page ใน GatsbyJS กันต่อ เพื่อทำการส่งค่าไปยัง Cloud Function ที่เราสร้างไว้

โดย code การทำงานในส่วนของ handleSubmit มีการทำงานดังนี้
handleSubmit = e => {// highlight-startconst email = e.target.email.valueconst telephone = e.target.telephone.valueconst subject = e.target.subject.valueconst detail = e.target.detail.valueconst message = 'คุณได้รับข้อความจาก: ' + email + '\n' + 'โทร: ' + telephone + '\nเรื่อง: ' + subject + '\nรายละเอียด :' + detailconst url = 'https://url-cloud-function'const data = { 'message': message }fetch(url, {method: 'POST',body: JSON.stringify(data),headers: { 'Content-Type': 'application/json' }}).then(res => console.log(res)).catch(error => {console.error('Error: ', error)}).then(response => {this.setState({email: '',telephone: '',subject: '',detail: '',open: false})})// highlight-ende.preventDefault()}
Share
Related Posts
Quick Links
Legal Stuff

